Table of Contents
Google Looker Studio (formerly Data Studio) is a free powerful tool that allows you to create reports that will translate your marketing data into business decisions! This software allows you to combine multiple data sources and blend your business data in just one place.
In order to take full advantage of this tool, make sure to be familiar with all of its useful functionalities. In this post, we will walk through on the 3 was to share Google Looker Studio Reports:
- how to download the whole report or specific pages/slides in a PDF file
- how to export the raw data of your dashboard in a spreadsheet / excel for further deep-dive
- how to use the built-in email functionality to send your data via automatic email delivery
Ready to explore all the possible ways you can share your data out of Google Looker Studio? Keep reading!
How to Download a Looker Studio Report
Whether you want to have your report printed to brainstorm with your team, or you have been asked to send it as an attachment one thing is sure: Your Looker Studio report can be easily downloaded as a PDF and let you save or print a snapshot of your data!
Steps for downloading the report as a PDF
- Login to your Google account and find the report you want to download.
- Hover over the header of the report and click on “Share” (down arrow), then select “Download Report
“.
- Choose between the complete report (All Pages) or specific sections of it (Select Pages). If you select specific pages, make sure to mark all the pages you want to download.
- Configure the additional options such as passport protection and report link in PDF.
- Click on “Download” and you are ready!
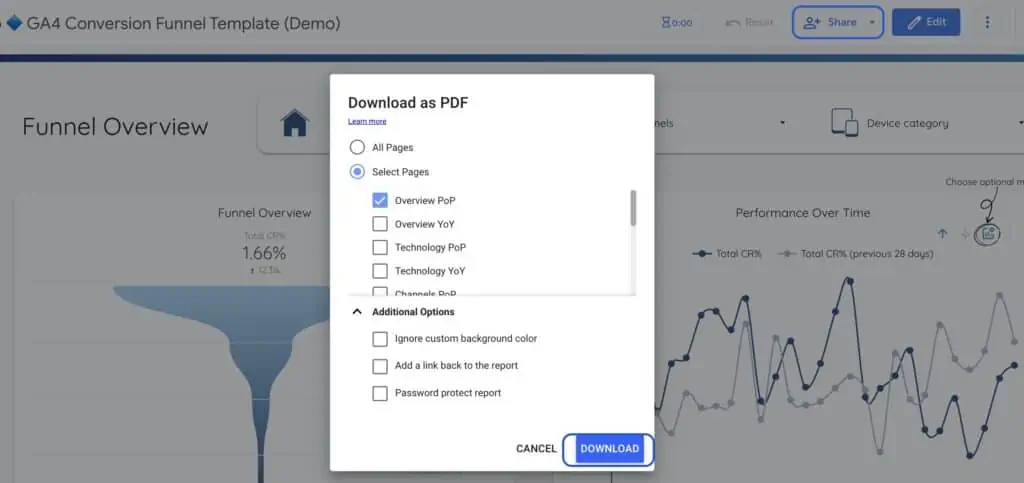
Your Looker Studio report is downloaded to your computer and you are ready to use it offline or archive it on your disk for future work.
How to Export Data in Google Looker Studio
Apart from downloading your report in a PDF, you can easily export your data from specific charts and tables in your report. This functionality enables you to further analyze your raw data in a spreadsheet or a CVS file just in 5 steps.
Steps for exporting data from a chart
- Open the report.
- Hover over the chart or the table you wish to export.
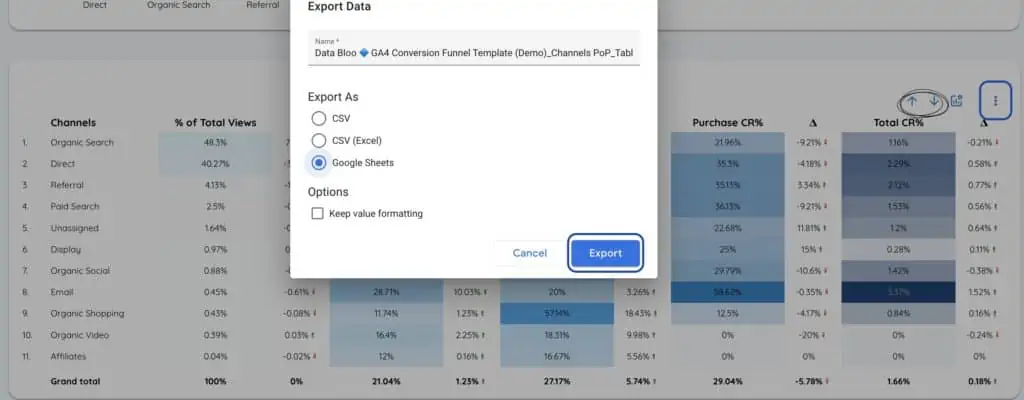
- Right-click on the chart or click
and select Export (make sure you have edit access to this report – otherwise you cannot select this option).
- Choose whether you want to download the data as a CVS file or export the data to a Google Sheet.
- Select the Keep value formatting option if you wish to retain the number and date formats applied in Looker Studio in the exported data.
If you do not wish other people to be able to export data from your report, you can always change it from the sharing options.
How to Schedule Email Delivery in Google Looker Studio
As we previously mentioned, there are times you want to send your work to your teammates, and downloading the Looker Studio report as a PDF is something very easy!
Now that you learned how to download Google Looker Studio reports, let’s have a look at how to share these reports on a regular basis through email. Just follow the steps:
Steps for the scheduling email report
- View the report you want to schedule.
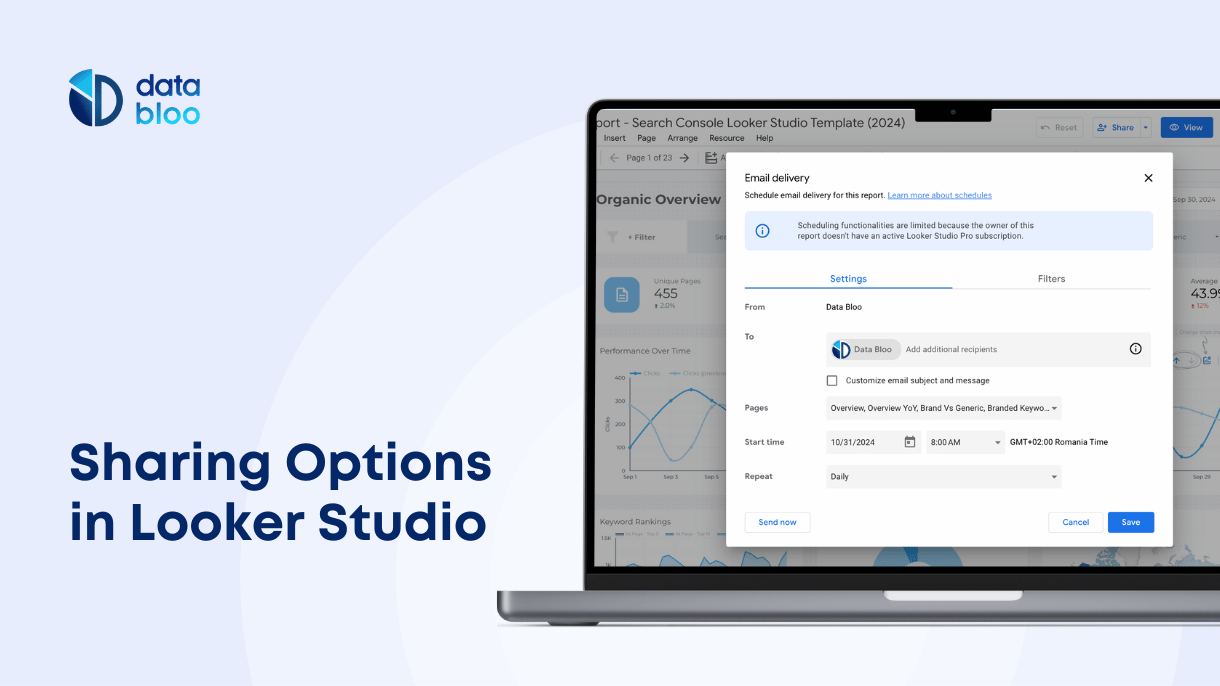
- In the top-right of the report select “Share“, and then click on “Schedule email delivery“.
- Customize your email by adding the recipients, the subject line, and your message.
- Select the report pages you want to include in the email.
- Schedule the date and the time you wish to begin sending the report.
- Set the delivery frequency.
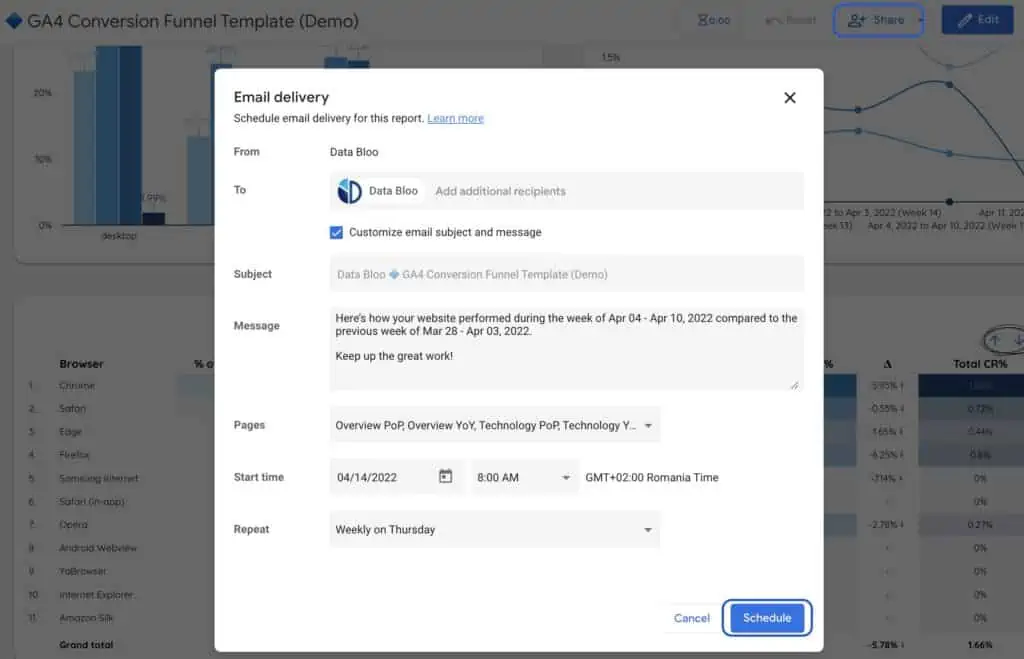
Scheduling email delivery is a feature that can save time for you and your team and let you share all the important data on a regular basis. For Looker Studio email delivery remember that you must be the owner or the editor of the report you wish to share.
Google recently released a new similar functionality for alerts to get notified when key metrics meets of your business meet specific conditions. However this feature is only available to Looker Studio Pro users.
Change the email delivery
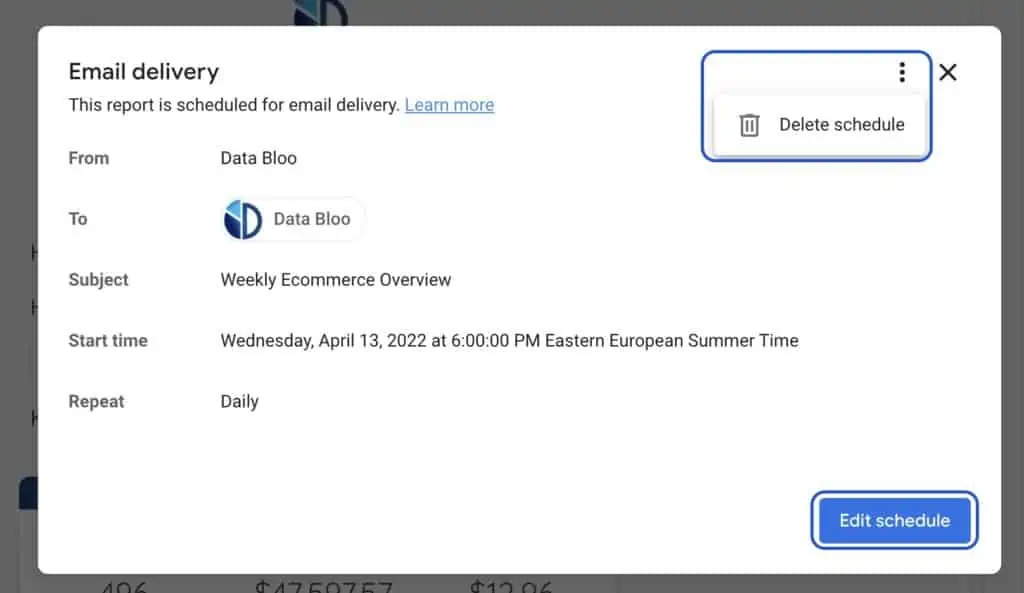
Once you have configured the email delivery for your report, you can easily edit or delete the specific send-out. In order to do that, you should open the “Schedule email delivery” window and you can either click “Edit schedule” to change the existing email delivery settings or delete it by clicking “Delete schedule” as shown below.
Looker Studio Email Report Example
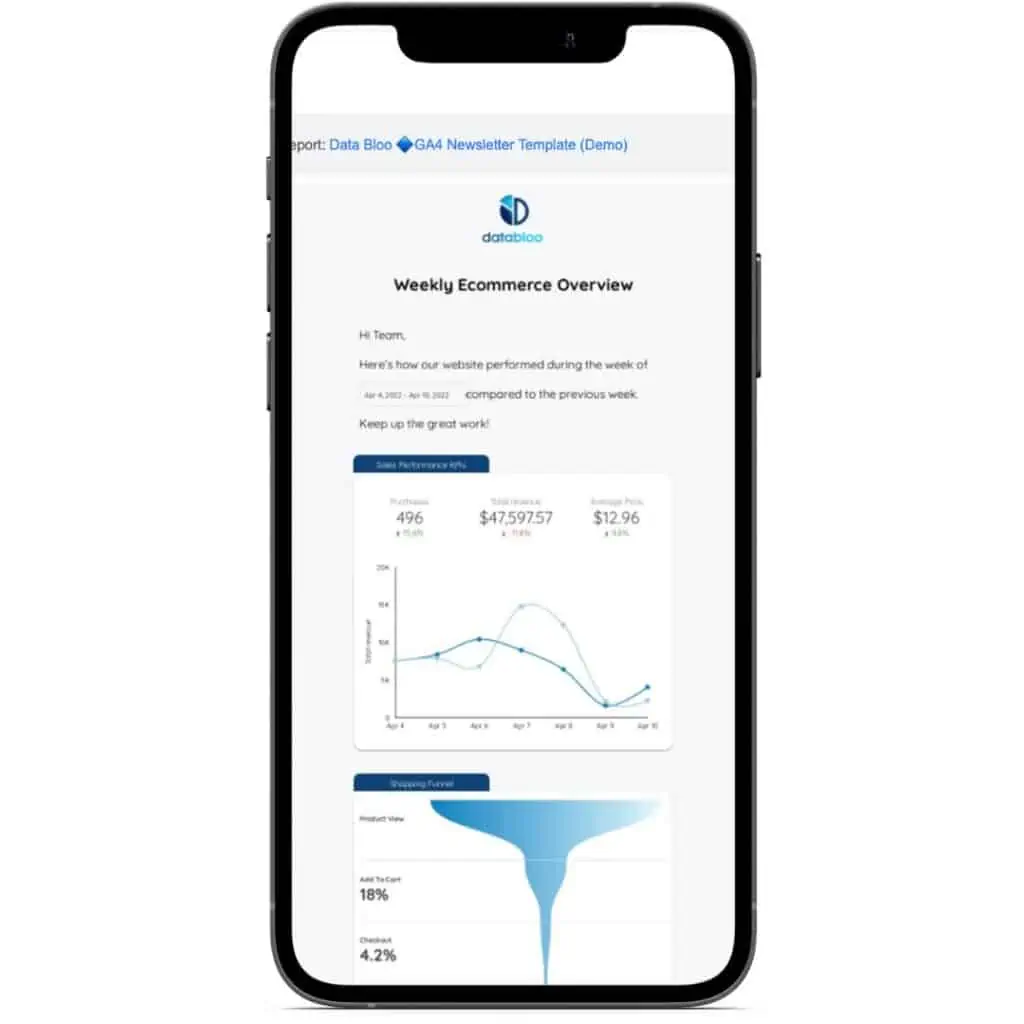
Email delivery is a great feature of Google Looker Studio that allows you to expand your reporting capabilities. For instance, you can create a Looker Studio Email Report that is fully optimized for newsletter layout, so you can receive your (or your clients’) business updates in your mailbox regularly. Here is an example that we have created for the Weekly Ecommerce Overview. If you are a Looker Studio Pro user you can view this template on the mobile app as well.
