Table of Contents
Calculated fields and functions are the core of any data visualization platform such as Looker Studio. They allow you to analyze your data and add new metrics and dimensions to your reports. Looker Studio calculated fields and functions can help you transform the dimensions and metrics that are coming from your existing data sources.
If you are new to Google Looker Studio, you might need some guidance on how to use the calculated fields and functions. We have created a detailed guide to help you get started. You will learn what the calculated fields are and how you can use them to add new dimensions and metrics to your reports.

What are the Looker Studio Calculated Fields?
According to Google, a calculated field is “a formula that can perform some action on one or more than one field in your data source”
In easy terms, calculated fields and functions enable you to perform arithmetic or statistical operations on data to add new metrics or dimensions.
Google Looker Studio calculated fields can perform the following actions on data:
- Arithmetic or mathematic
- Manipulation of text and other information
- Add logical comparisons to evaluate data
Through calculated fields, you can perform an in-depth analysis of data gathered from various sources.
What are the Looker Studio Functions?
Google Looker Studio Functions allow easy manipulation of data. They are more complex than simple arithmetic operations. Calculated functions include aggregation functions, manipulation of geographical information and date, and transformation of text data. Looker Studio provides over 50 functions that can be used on the given data.
How to Create and Edit Calculated Fields in Google Looker Studio?
Calculated fields can be quite useful for in-depth analysis of your data. You can use these fields to create new arithmetic and logical functions.
The fields can be used in any report that uses at least one data source. Once you have connected your data source with Looker Studio, you can use the calculated fields to add different formulas.
Create a Calculated Field Example
You can add different arithmetic functions to your data. For instance, if you want to find the unique keywords that are ranked on your search engine results, you can use the following formula:
COUNT_DISTINCT(Query)
Here are the steps you should follow to do it:
Step 1) Create a new field

Step 2) Type your formula for the new field
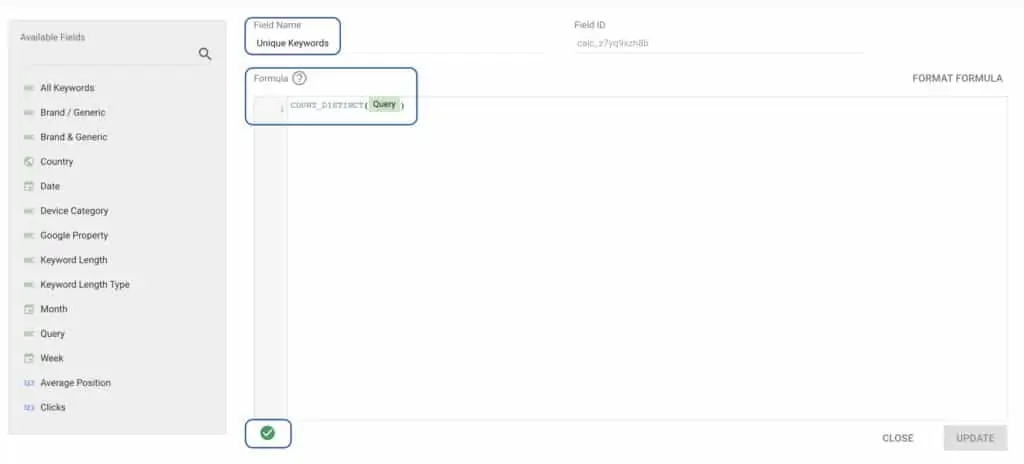
Make sure that the formula checker will be green at the bottom, meaning that the syntax in your formula is correct (otherwise you cannot create the new field).
Once you create the field, the output “Unique Keywords” should be displayed as a separate row in your data source.
Step 3) Apply the type of the calculated field

The data type is also important in this case. For instance, if you want to use arithmetic operations such as SUM, COUNT, etc, you can add them only to numeric data and they produce numeric output. On the other hand, string functions such as CONCAT should be added as text.
Edit Calculated Fields in Looker Studio
In order to edit an existing calculated field in Google Looker Studio, you should open your data source and then click on the grey area “fx” as shown below.

This will allow you to edit the formula for your calculation but there is also much more you can do with the calculated fields. This is something that you can learn with practice, and it also requires a basic understanding of regular expressions and some basic computer programming. However, if you are a beginner, you can use our ready-to-use templates that come with calculated fields to make things easier for you.
Looker Studio Functions to Use for Your Reports
Let’s take a look at some of the functions you can use in your reports;
- Conditional Case: It is used to add a branching logic to your data. You can apply several conditions that can let you sort data. For example, the CASE WHEN function can let you add a condition with two possible outputs, and only when this condition is applied, the data after THEN would be displayed as output. Otherwise, it would add the data after ELSE.
Looker Studio Case When Example -> CASE WHEN (REGEXP_MATCH(Query,Brand Terms)) THEN “Brand Keywords” ELSE “Generic Keywords” END
- Conditional If: Similar to the above mentioned function, If function also adds a branching logic to your data. For example, if the bounce rate is above 0.90, the result would be Pass, otherwise it would be Fail.
Looker Studio Conditional If Example -> IF(Bounce Rate > 0.90, Pass, Fail)
- Aggregation: These arithmetic functions are used for numeric data, to add, subtract or count the values. For instance, you can use COUNT_DISTINCT to find the number of unique values of a specific dimension.
Looker Studio Aggregation Example -> COUNT_DISTINCT(Query)
- Date: Looker Studio calculated fields also allow you to manipulate the dates collected from data sources. For example, you can try the DATE_DIFF function to find the difference between starting date and ending date.
Looker Studio Date Example -> DATE_DIFF(End Date, Start Date)
- Text: You can use the text data types in calculated fields as well. There are several functions available to manipulate textual data. For example, with CONCAT you can join multiple strings together.
Looker Studio Text Example -> CONCAT(Age,” – “,Gender)
If all this stuff sounds too complicated for you, you can try one of our templates, that can help you get the hang of using the calculated fields that are essential for your reports. Data Bloo is the #1 contributor of Looker Studio Gallery as the majority of our ready-to-use templates have been featured by Google. You can select the template that fits your requirements and improve your decision-making about your business.
Top 5 Google Looker Studio Formulas for Calculated Fields
Let’s take a look at some of the best Looker Studio calculated fields that you can use in your reports, based on your business.
1. Content Grouping (for Content Marketing)
If you are trying to analyze website traffic data, you can use custom page grouping to add similar pages under one group and analyze their traffic as a single dimension in your report. For example, you can add all the blog pages like a Blog group using CASE WHEN.
CASE WHEN (Page=”/”) THEN “Home” WHEN (REGEXP_MATCH(Page, ‘.about-us.’)) THEN “About us” WHEN (REGEXP_MATCH(Page, ‘.blog.’)) THEN “Blog Pages” WHEN (REGEXP_MATCH(Page, ‘.product.’)) THEN “Product Pages” WHEN (Page=”/contact”) THEN “Contact Us” ELSE “Other” END
This is calculated field is featured in our Content Performance Template.
2. Paid & Owned Channel Grouping (for Performance Marketing)
To evaluate marketing performance, you can use the custom grouping to identify the performance of paid and organic channels using the CASE WHEN calculated field in Looker Studio.
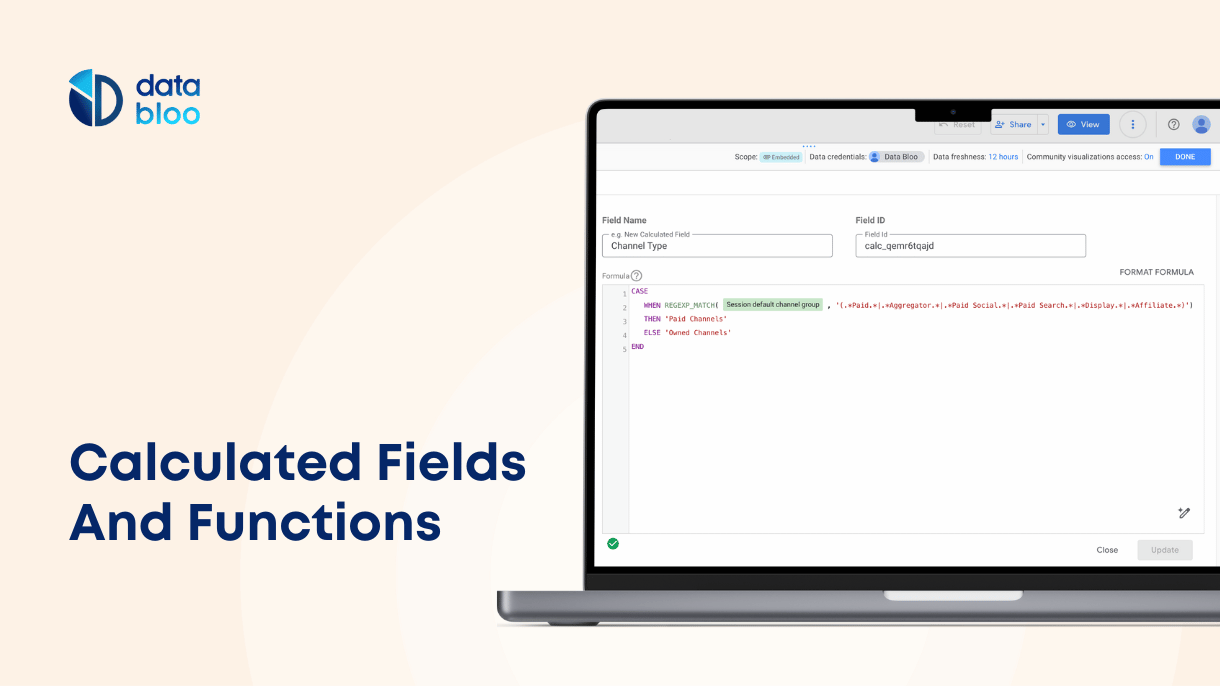
CASE WHEN REGEXP_MATCH(Default Channel Grouping, ‘(.Paid.|.Aggregator.|.Paid Social.|.Paid Search.|.Display.|.Affiliate.)’) THEN ‘Paid Channels’ ELSE ‘Owned Channels’ END
This is calculated field is featured in our Custom Master Templates.
3. Checkout Funnel (for Ecommerce)
For e-commerce sites, it is essential to check customer behavior and the stage at which they drop off. That is where the checkout funnel comes in. You can identify how many customers actually purchase the items added to the cart using the CASE WHEN calculated field.
Case WHEN Event name=”view_item” THEN “Product View” WHEN Event name=”add_to_cart” THEN “Add To Cart” WHEN Event name=”begin_checkout” THEN “Checkout” WHEN Event name=”purchase” THEN “Transaction” END
This is calculated field is featured in our Google Analytics 4 Template.
4. Branded & Generic Organic Keywords (for SEO)
To identify the performance of your branded keywords, you can use the calculated fields to determine how your users find you on search engines.
CASE WHEN (REGEXP_MATCH(Query,'(.*brand term 1.*|.*brand term 2.*)’) THEN “Brand Keywords” ELSE “Generic Keywords” END
This is calculated field is featured in our Keyword Ranking Report Template.
5. Keyword Ranking Position (For SEO)
You can use the Looker Studio calculated fields, particularly CASE WHEN to find out which of the keywords are ranked in the first top 3 positions on search engines. This can allow you to analyze your keyword’s ranking distribution.
CASE WHEN Average Position < 4 THEN “Top 3” WHEN Average Position < 11 THEN “Top 10” WHEN Average Position < 21 THEN “Top 20” ELSE “Rest” END
There is so much more you can do with the calculated fields. Try our ready-to-use templates to get started with the calculated fields.

